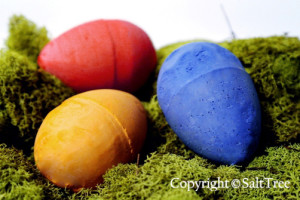
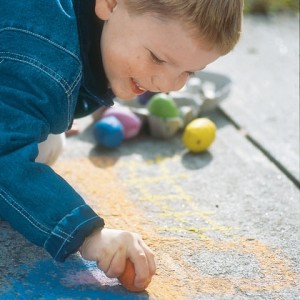
As I have shared with many of you, making Easter Egg-shaped chalk was one of my family’s most favorite ways to celebrate. We enjoyed making these eggs so much that we made a lot of them. It has been several years since we made eggs and we still have quite a few left.
The three things that we liked best about this project were that it was a quick, easy and a relatively clean project, the kids could be involved in the whole process and it helped us to celebrate Easter during the whole season, from planning through to Easter Morning and for days, well years, after. It also makes a great art project for spring through summer and fall, keep this in mind while planning chalk colors.
I don’t have the specific directions we used, but I have found links to several other blogs with basically the same instructions, or at least as I remember them. I’ll share those as we go along. First, let’s start with what you need to make these colorful eggs.
Items Needed:
- Plastic eggs
- Petroleum Jelly
- Plaster of Paris
- Powder Tempura Paint
- Empty egg carton (helpful but not necessary)
The plan is incredibly simple. I like to start by having the kids liberally coat the inside of the eggs with petroleum jelly. It’s fun for them. They are sure to adhere to the ‘liberally applied’ policy which makes getting the eggs out of the plastic later much easier, and I enjoyed it when my wife found door knobs slathered in the jelly later. <She didn’t though; yes, I’m a little cantankerous.>
While the kids are busy with the eggs, I mix Plaster of Paris with water per instructions on the Plaster of Paris. Then I have the kids join me as we add Powdered Tempera Paint until we get the color(s) we are looking for. This can be a great activity to aid in understanding the color wheel.
Next, move the colored plaster mix into each half of the plastic eggs filling the halves almost completely. We filled matching halves of the eggs with the same color of plaster mix so each egg was a single color. This is where the egg cartons come in handy, especially if you have twice as many cartons as you do eggs, because you let these eggs sit half filled until the plaster starts to set up into a muddy consistency. The egg cartons hold the eggs up nicely during this step and make a great place for storing the eggs as they dry and later when they are not in use.
Since we made more of each color than would fit any one egg, we had some eggs that were half and half colors. As with almost anything we do with the kids, I like to let them experiment. Maybe combine two different colored halves, then you would have a dual colored chalk. You could event try combining different colors in the same egg and only stirring them once or twice to create a swirl. I know that is so crazy. Have Fun. Once they have set up a little, you will, quickly, piece the two halves together to complete the egg. It is good at this point to shake the eggs so the plaster of the two halves mix into one egg, otherwise you may end up with two half-egg chalks. Let the eggs sit overnight to set up.
Finally, whatever you do, DO NOT POUR THE EXTRA DOWN YOUR DRAIN, think cement in the pipes. I think this would be a no-brainer, but we often disconnect our brains until after we do something, so I’m putting it here for people like me.
LINKS:
If you haven’t talked about mixing colors yet, Mr Printables has a nice, well, printable that you can use to show kids how colors mix, then let them mix their own as they make chalk.
Three Egg Chalk Links I liked are Disney’s Spoonful Ballpoint Eggs post. It is clean, concise and easy to follow.
I also liked SkipToMyLou’s Egg Shaped Sidewalk Chalk post. It goes a little more into detail and they use the liquid tempera paint which seems to work quite well too.
Finally, I like Amber’s SaltTree Easter Egg Sidewalk Chalk post. Amber fills her eggs a little differently and doesn’t use the petroleum jelly at all.


